if you have poked your head into my blog and website and / or instagram feed (@jnanian) you already know that I have been making cyanotypes for almost 20 years.
The Chemistry
I do not use the REX recipe or the new cyanotype recipe but the original one with ferric ammonium citrate (green) [solution A] and potassium ferricyanide[ solution B]. I use something close to the original recipe invented by Hershel . In the “REX” recipe one coats the paper with solution A first, make the exposure and develop it out in a bath of solution B. The New Cyanotype method also uses other chemicals like Dichromate to alter and control the contrast. The “classic” / Hershel recipe is much simpler, it is just parts A+B are mixed together in equal proportions.
There are as many variations for the classic recipe as there are people who make cyanotypes. It is 200g [A] + 1000cc water: 160g [B] + 1000cc wate. When used the 2 components are mixed in equal parts. The variation done to customize the process.
I used to only coat my paper with 1 coat of the chemistry but now I coat it with at least 2 or 3.
The Negative
Just about anything can be used as a negative, it just needs to be able to block and transmit UV light to the chemistry. Fabric, biological things, metals, glass, plastics and paper. I’ve shown in this blog how easy it is to wax paper negatives.
https://www.nanianphoto.com/blog/how-you-make-waxed-paper-negatives/
https://www.nanianphoto.com/blog/waxing-paper-negatives-revisited/
Camera film can be used as negatives, as well as prints from your local Xerox shop on overhead transparency film ( last time I did this they cost 80cents for a 81/2×11 sheet ). If you have a cheep laser printer you can buy a box of the same overhead transparency film and print them at home. I made the images in this series with a 20 year old Nikon digital camera and transparency film with a laser printer that cost less than 100$. https://www.instagram.com/p/CpISFSwOi5n/
You don’t really need to spend money on expensive printers or gear to make cyanotypes. They can be done with just your cellphone and if you don’t have a program to invert your images into a negative there are online resources that will do it that cost nothing ( I typed in “free image invert” in duck duck go and came up with this: https://duckduckgo.com/?q=free+image+invert , while I haven’t used this service I know of people who have recommended them ).
The Exposure
You put the negative on the paper, with a heavy piece of glass or “contact frame” or sheet of plexiglass, or … to make full contact with the paper and leave it in the sun to be exposed. Remember the negative goes ON TOP OF the paper. It’s easy to be very excited about making photographs and do things by mistake. If this happens to you, don’t fret. It’s just a sheet of paper. Sure time is valuable but you are enjoying yourself, so it’s time well spent. Maybe you just flip the paper over and nothing happened and you liked effect. Regarding the print frame, you don’t really need it. Full contact with the paper isn’t mandatory, nothing is. If you don’t want don’t do it, it’s up to you.
Sometimes sun exposures take hours depending on your negative and the type of day it is. Winter and snow, sand at the beach &c might shorten your times because there is more UV being reflected onto the paper. If you don’t want to make exposures in the sun and have the space, time and money, you can buy things that emit the right type of light. It might be a tanning lamp, or a LED light bulb in an old fashioned contact printer you got on Ebay for 20$, or LED lights that people string up in their rooms, or long UV bulbs that look like old fashioned fluorescent bulbs. I have a few different light sources that I use and they all work great, but I love just using the sun. It’s free and works every time.
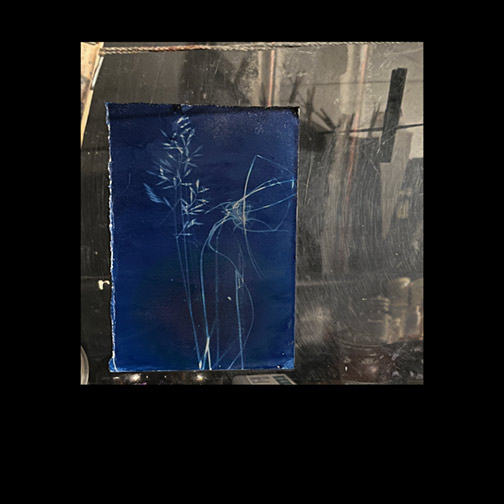
Shadows, refraction movement, it’s all fair game, again, no rules. The UV light reacts with the chemistry, and develops-out the image on the paper. When the paper turns grey it might be done. You can peek under the negative if you are careful to see if there’s an image, if there isn’t, keep exposing, if there is, and it is “dark enough” you can wash it and see how it looks. The part exposed to intense light turns Prussian blue, and the parts of the image that are blocked by light ( the image from the negative or the thing you put on the paper to block the light) there are variations of tonality. Sometimes it’s pure white, sometimes it’s yellowish, sometimes it’s reddish, or brownish. They take a little while to wash, and when the washwater is no longer yellowish ( it’s just iron being washed out ) it might be done, continued washing won’t really hurt it, unless your paper doesn’t like being wet. The image will get bluer and bluer as it is in contact with the air, or you can speed up this process with hydrogen peroxide, the cheep stuff from the dollar store works great. You ‘ll see the image “pop”. Maybe you are done, hang it up to dry and see what it looks like. Like a silver print, the tonality might get darker because the paper shrinks a little bit, it’s called “dry down” …
Bleaching and Toning
If you have super washing soda ( sodium carbonate ) it only takes a little bit in your tray of water to “bleach back” some of the blue and brighten your new print’s whites. If you want to remove more of the blue tonality, leave the print in the bath a little longer, you will see the tonality change to yellowish colors. Be careful it might happen fast and your paper absorbed the bleaching chemistry like a sponge so small amounts is always good. I sometimes have a sheet of plexiglass that I use my 40 year old windshield wiper with to squeegee water off my prints to hang or dry (sometimes I use it behind my prints to photograph them ), and I have a hose attached to my faucet and I use a brush to apply the washing soda. I brush it on and wait a little bit then I rinse it in water. When it looks close I just wash the print in running water. If you don’t have washing soda you can use baking soda (sodium bicarbonate ) it’s sort of like washing soda, pH is a little different, and it might take more baking soda to do the same bleaching, but you won’t really notice that much of a difference. Another chemicals you might try is Borax. Also found in your grocery store and instead of yellows and greens being left behind, you will find different tones. You can tone your print with tea or coffee or mud or reed dye or a lot of different materials. I tend to use non toxic easy to procure things like tea or coffee because when I started making these prints I had little kids in my home and I never wanted anything very harsh. You can also play around with watercolor paints and make your print any way you want.
Afterwards, maybe Image editing software
As I mentioned before there really are no rules to any of this. Sure there are purists whose methods stop at what you just finished, but you don’t really have to stop there if you don’t want. I scan my images or make a cellphone snapshot of them, and when they are in the computer sometimes I adjust things a little bit. Usually the rephotograph process screws around with the image’s tonality so you can tweak that a little bit, or you can go full on digital manipulation and adjust whatever you want. If someone asks “why did you do that” just have an answer, and sometimes “because it wasn’t finished and I wanted to” is good enough.
Where to buy premade paper
If you want to make cyanotypes but don’t want to deal with buying chemistry or kits from photo chemical suppliers ( like Artcraft Chemical, Bostick and Sullivan or the Photographer’s Formulary ) you can buy pre made / pre coated cyanotype paper. I have bought some from The Cyanotype Store, and it works great! They also sell fabric coated with the same chemistry if you want to use fabric instead of paper.
Now after that whole long winded ramble about making cyanotypes,
Here are my last few…