so you bought some tmax100+400 4×5 film and you are tired of the clinical almost “digital” look it gives you because of it’s tabular grain. you did it, and got the T-shirt … and now you are tired of grainless images.
You don’t have Rodinal because you aren’t sure which of the versions you should get. You read that it works great and gives fantastic grain but was that RO9, Blazinol, Adinol or the version of Rodinal you got in the crusty bottle from 1930. I know, it’s confusing.
I’ve never used Rodinal so I can’t really help you decipher the code. I can tell you from experience you can use Caffenol, either with beans I sell by the pound that I roast myself (15$ / lb) or instant it might be what you are looking for. I don’t use all the fancy recipes with salt and potassium bromide or whatever else people put in there that you might read about on the Massive Development Chart or the caffeneol blogosphere, but I did help write the caffenol cookbook and from 20 years experience I can tell you it can help you with a little grain, or at least distress your film.
you will have to do a few tests to determine your time and exposure pathway, I know with what I do, it’s typically over expose a few stops and develop (I shuffle ) with a speck ( 20cc / L ) of your favorite PRINT developer in it for about 14-15 minutes, but that’s me. I have no idea what your shutters do, how you develop your film &c.
you might have to do a test sheet of film or 2 bracketing your exposures. Like you would make a test strip under the enlarger, just use your dark slide to drag across the front of your lens breaking the film into segments. Do this a few times and develop each film adding 50% more development time each sheet. If you shuffle, don’t forget depending on what your “stack” of film is it changes the agitation scheme. I usually develop between 10 and 30 sheets at once. in a 5×7 tray.
I put the film in a water bath one sheet at a time. they usually stick together so carefully pry them apart. this pre soak gets rid of the anti halation layer but most important it allows you to contstantly count how many sheets you have while you are shuffling your film to make sure you dont’ have sheets that stuck together.
once you develop stop and fix normally and hang to dry.
your film might look dark, that’s OK if you have photo paper you’re now going to contact print the images on whatever paper you have and look at each sheet and development and exposure combination to determine which one works for you.
roll film I bracket too and you can do this same sort of thing for 35mm or 120 film. They might be difficult to print if the film has a lot of density.
This works well with films that are printed, films that are scanned might require less exposure to bring the grain out.
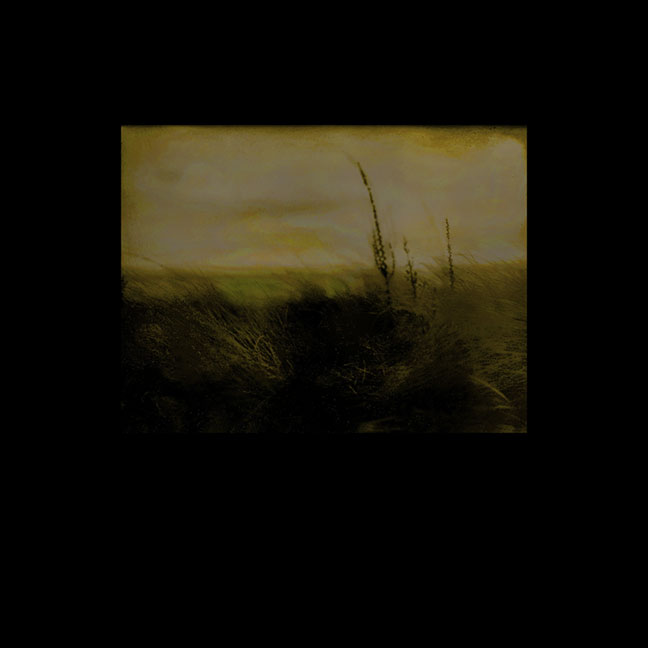
this image was made doing that method. After I had the print I scanned it and dusted it in photoshop, added a little tone and adjusted the levels.